Mod Source: Replaymod
Many software programs allow you to save your Minecraft parts from your point of view. Your eyes are the camera and viewers will, at best, enjoy a third-person view, offering a better view of the player’s environment. The Replay Mod of CrushedPixel and Johni0702 allows you to record your game in all its dimensions. In post-production, it gives you the opportunity to move the camera in the scenery where you filmed with flowing animations and all the entities met.
This is the ideal tool for builders dreaming of discovering their sites, without the need to call a cameraman. The same goes for pvp lovers wishing to share their exploits. This mod is easy to use and works great even if you are limited to Minecraft version 1.8. You should also know that the installation requires an additional step that I will tackle at the bottom of the article, in the “Installation” pane. I now propose to go around the features of the Replay Mod.
Filming and viewing
Once the mod is installed, your games will be automatically saved. A little message in the chat, as well as the appearance of the logo below, in the upper left corner of your screen, will testify. You enjoy a normal gaming experience without slowing down. Once you leave your game to return to the home menu, the recording is complete and the video is ready to play.
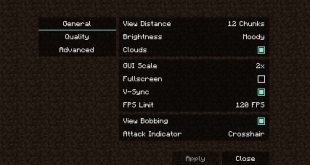
If you do not want your games to be filmed, go to the game options and then to the “Replay Mod Settings” menu. The first two options, “Shoot solo parts”, “Shoot multiplayer games”, are enabled by default. Click both boxes to disable the recordings, repeat the operation to reactivate them.
To review the videos and start processing, go to the main menu and click on “Replay Viewer”.
Simply select one of your shots to access a number of basic options that speak for themselves. The “Settings” button allows you to change the options for capturing your games. “Open Replays Folder” gives you direct access to the folder where all records – with the “.mcpr” file extension – are archived. “Upload” allows you to share your creations on the Replay Mod creator’s website.
You can now double-click on one of the replays to view it, start the edit. At the top of the screen are these two bars called timelines : they have a time scale. The top one is the current view and the bottom one is your editing table . Each has its “play” button so that you can scroll through your game (you can also use the P key ) or your editing. In addition, a slider is available in both timelines so you can navigate through time more easily.
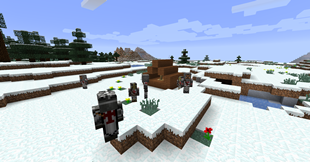
You can also move in the space with your usual directional keys (It is possible that there are conflicts between your keys and those installed by the mod). Thus, you can follow the players in a certain field limit.
Mounting
Once your parts are filmed, you may need to shorten them, assemble several replays to form a video that you can mount. You can use the tools in the “Replay Editor” menu to make quick adjustments like grouping replay, cutting the beginning and ending of your video.
The first menu allows you to cut the beginning and end of a replay that you have previously noted the start timecode and the end timecode . Once these two data are entered and the correct replay selected, you can choose to create a copy or overwrite the original.
The second menu is the assembler. Simply place the replay in the correct order and save, always choosing to make a copy or delete all fragments to keep one.
Axis of the camera and personalization space
Axis of the camera
Now we can finally move on to creating the video! The Replay Mod offers some tools for managing your camera. Do you say that what you see will be what the viewer will see, you are his eyes. You can tilt the camera to the right or left with the J and L keys . The K key allows you to reset the axis.
For resource-saving reasons, the lighting is off. This removes some shadows that you can reactivate with the W key .
Entity Management
More than just players, Replay Mod lets you place 2D images inside the scenery , with the ability to manage multiple settings like opacity, size, orientation, all in the timeline with the possibility to make animations : The image is in an initial state – let’s call it “point A” – that you define when the yellow bar (the cursor) is at the beginning of the timeline. If you move this slider in time and you set other parameters, the software will save a new state that we will call “point B” – you can set as many points as you want. The mod will calculate a transition, so that the appearance of the “A-point” image becomes the “B-point” image smoothly. If “point A”, 1 minute, my image of Minecraft-France is very small and that “point B”, 2 minutes, it is very large my image will grow between the two times.
Videos;
To know more about the mod, we invite you to consult the wiki of the site which is extremely complete

aint working for me eyy